Friday, September 16, 2011

Arduino

Greetings

Sorry for the long hiatus in posting. I had no time to create anything, what with all final exams of grade 11, and didn't have my kits for the entirety of the summer vacations. In any case, I ma back now.

A technology that has now interested me is Arduino.  Arduino is an open-source electronic prototyping platform, which comes with an AVR ATmega328  microprocessor, 14 digital input/output pins (of which 6 can be used as PWM outputs), 6 analog inputs, a 16 MHz crystal oscillator, a USB connection, a power jack, an ICSP header, and a reset button.The micro controller can be programmed using the Arduino programming language, which is based on Wiring. Wiring is pretty much C/C++, but with two mandatory functions that have to be defied to run the program: loop() and run().

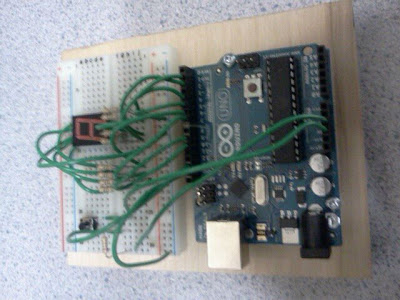
Once I got my hands on an Arduino, I immediately borrowed a seven-segment-display, which has 6 input pins and 2 ground pins. After  connecting these input pins with six digital input/output pins on the board, I connected the two round pins to the ground on the Arduino. Then I got a simple push button, and connected it to +5V., ground and one of the input/output pin on the board. So, whenever I pressed the button, +5V would be sent to the digital input/output pin, which I could detect.

Then I created a simple program, which would define the state of the LEDs in the seven segment display, to display a certain digit. For example, for the digit 1, the state would be defined as

0, 0, 0, 0, 1, 0, 1, 0, 0, 0, 0

which means that only 2 leads from the seven segment displays must be give power and in this case it is leads 4 and 6. There is also code in the program to increment numbers by and roll back to 0, when he number is 9, whenever the button is pressed.

I don't have a schematic of my circuit, but I did manage to take some pics. Here you go:

View from the top. Notice the 7 resistors.

Another view
And here is the fully annotated code. You will need the Arduino software to compile it.

Link to the code (.pde file)

This is not the end.

Friday, April 29, 2011

Pocket Solver

Greetings.

For the past few days, I have been busy working on an iPhone Application. I will let you know the details later, but first let me narrate my journey in the mysterious and interesting world of iPhone application development.
    Being a generally Windows/Linux guy, I had no way to get my hands on a Mac. I wasn't willing to spend in the excess of $600 for a Mac(Mini). But thanks to the hacker community, I had a cheaper option. I used VMware Workstation and bought a copy of Mac OS 10.6. Then I proceeded to create a .iso file of the 10.6. Using a preconfigured Virtual Machine along with with custom built audio and video drivers and my Mac OS 10.6, I was able to run 10.6 on a virtual machine on Windows! I will create a blog post explaining how to do this, but tutorials can be found online.
    Once I got my "Mac" up and running, it was only a short while before I downloaded Xcode and the iOS SDK and started working on my app. It is a simple app that solves math equation AND outputs the full written solution. It is thus called Pocket Solver. It is a free application that my company Affordable Software Solutions released.  You can download it later find out about its features. Until then, here are some pics.


Anyway, this post is not to discuss the various features of my app or to promote it. Okay, maybe a little. But in this post, I will share some of the algorithms I  came up with to solve linear equations in two and three variables that will make your life much easier (if your life consists of solving linear equations...)

1) Linear Equation in two variables

Suppose you have a system of two equations that are in the form:

ax  + by = c    
dx + ey = f

then your x value will be equal to:

((c*d)-(f*a))/((b*d)-(e*a))

and your y value will be equal to:

(c*d-(x*b*d))/(a*d)

where x = ((c*d)-(f*a))/((b*d)-(e*a)).

looks complex, doesn't it?  All these algorithms actually do is eliminate the y variable and solve for x, and solve for y by substituting the newly found value of x in the equation.

If that didn't explode your head, here is another one...

2) Linear Equation in three variables

Suppose you have a system of three equations that are in the form:

ax  + by + cz = d    
ex  + fy + gz = h    
ix  + jy + kz = l 

Let us create six variables that contain a certain series of functions that we will use the most.
Let

    ae1 = (b*e)-(f*a)
    be1 = (c*e)-(g*a)
    ce1 = (d*e)-(h*a)   
    ae2 = (b*i)-(j*a)
    be2 = (c*i)-(k*a)
    ce2 = (d*i)-(l*a)

Now we will use these substitutions to find out the values of x, y and z.

So now, your z value will be equal to:

((ce1*ae2)-(ce2*ae1))/((be1*ae2)-(be2*ae1))

and your y value will be equal to:

((ce1-(z*be1))/ae1)

where z is equal to the equation above.

And your x value will be equal to:

(d-(z*c)-(b*((ce1-(z*be1))/ae1)))/a

where z can be found using the first equation.

Once again, I systematically eliminate x, create two equations with only y and z variables, eliminate y, find the value of z, substitute for z in one of the two newly created equations and find y, and substitute for y and z in the given equation and find x.

Wow, that was a lot! I am sure that you can further simply the algorithms, but  I haven't tried to do so. I encourage you to tinker with the algorithms, simplify them and make them more elegant. You have permission to use this algorithms in your projects, but with proper credit given to Aravind Rao.

This is not the end....


Tuesday, April 12, 2011

CyclopsNXT

Greetings

It has been a long time since I posted any of my creations. This is because for the past few days, I had been working on possibly my most entertaining project to date: A NXT cyclops that can track faces! Before I get started, here are some pics.


Front View, base and cam

Side view, cam holder in detail

Gearing to turn the camera

I see you!

So to make this creation, I used the OpenCV wrapper for Java (JavaCV), Lejos as well as Java SE. This creations consists of two motors. One motor drives a set of gears which can tilt the camera up or down. Another set of gears rotates a geared base CW or CCW, which in turn rotates the camera. The camera itself is connected to a terminal, which is the only wired connection to an external terminal in the whole project. You can use Bluetooth webcams and do away with wires. The geared base, rotating motor and the NXT brick all sit on a pretty sturdy base, which rests on four wheels. The whole project is about 20x15x20 cm. So basically the camera has four degrees of freedom. So what does this project achieve and how does it do that? I wanted for a long time to be able to build a robot that could track objects in real time and this robot does just that. The camera gets input from the environment and sends it to the computer for processing. A Java/JavaCV program running on the computer processes this input video and draws a rectangle on all detected faces (program works with only one face though).
       Now a method in the program computes the distance of the edges of the box around the face to the edges of the video frame. If the distance from the left edge of the box to the left edge of the frame is different by more than 80px compared to the distance from the right edge of the box to the right edge of the frame, the JavaCV program on the computer sends a command to the NXT Brick to either turn left or right, so as to position the face in the center of the video frame. The same works in the y axis, where the distances from the top and bottom edges of the box around the face to the top and bottom edges of the video frame are compared. Again if the difference is more than 60px, the JavaCV program sends a command to the NXT to tilt the camera up or down depending on the scenario.
       So that is pretty much how the program works. I have posted links to the code below, from both the NXT and the Computer. It is annotated and licensed under the MIT OSI License. Feel free to go over the coed and edit it. Hopefully it is educational. If you are having problems building the robot itself, send me a message, and I can help you out.  I have posted pics above that can guide you. Oh and a huge thanks to Nashruddin whose blog taught me how to program face recognition in OpenCV! And finally here is a video showing the robot in action.


*LINKS*
Code on the NXT
Code on the computer
Classifier to detect faces, must be in the folder from which comp.class is running.

This is not the end...

Sunday, March 20, 2011

Open CVhat I can do!

Greetings:

I have decided to take a short break from Lego building(let us just say that I stepped on one too many Lego bricks) and decided to learn something new. I always wanted to incorporate vision in my programs, so I decided to learn a little bit of OpenCV. I actually want to use OpenCV with Lego Mindstorms, but since I am using OpenCV for c++, I would have to use JNI to get my LeJOS Mindstorms to successfully communicate with my C++ OpenCV program. (EDIT: I just found out that a Java Wrapper for OpenCV exists, so I may be able to give my Mindstorms "vision" after all!) Anyway, What I really was interested in was to use OpenCV to track eyeball movement. I will tell you why in the next post. Now how OpenCV tracks face and eye movements is relatively complex. I do not understand all of it, just enough to make my small eye tracking program work. Pretty much the face detection algorithm scans an image for Haar like Features, and if the image satisfies the condition of having a face, the algorithm further subdivides the face into many categories. For example in a typical face, the eye is darker than the cheek, and so when the algorithm compares the intensities of the pixels that make up the eye and cheek, it finds the difference in intensities and is able to distinguish between the eye and a cheek in a face.
          This is a very watered down explanation of what is *really* happening behind the scenes, and in reality, the face and eye detection algorithms in openCV are clunky at best without proper optimization. So I decided to create  small c++ program that takes in input from a webcam ans tracks the face and eyes in real time. It also superimposes images over the face. Face detection was pretty much straightforward. But the eye detection algorithm required further optimization. How it worked was that it all eyes that it discovered in an image(or video frame) it would store in a array. But the problem was that it detected 6-7 eyes at once! Now I only have 2 eyes(4 with glasses, but that not the point), so I had to make the algorithm pick only two eye objects from all that it had discovered. The optimization that I used was to pick the two eye objects with the largest area, and see how their x and y coordinates match up relative to themselves and the face(This is better explained in the annotated code posted below). After hours of tinkering, I have a created a program that tracks human eyes with movement in all 3 dimensions with ~85% accuracy in real time. It is good enough to start out with, but I figure I will have to do much more of optimization if I want to carry out a certain project(more on this later).
              I have posted the links to the annotated code below which explains how my optimizations work. They are no work of art, but they work satisfactorily. Also here is short video of the eye tracking in progress in real time.


Link to download the folder with code, .exe, classifiers and the other good stuff.

This is not the end......

Saturday, March 12, 2011

Mindstorms liquid dispenser

Greetings

Here is a simple project that I had been working on for quite some time. It is a Mindstorms powered liquid dispenser. Essentially it is a simple liquid dispenser that works on the principal of a diaphragm pump. Here are some pics which will describe the apparatus better than I ever can hope to by writing
Side View

Front View

Rear View

Close up of the water delivery system

        So the principle behind the dispenser is simple. A small compressor is driven directly by two NXT motors, converting circular motion to linear motion needed to compress the air in the compressor( think pistons.) The compressed air gets pushed into an airtight water container via a small rubber tube. As the air gets pushed in, the pressure gets increased inside the container. Now there is a secondary rubber tube with one end inside the water and the other end connected to the nozzle through which water is dispensed. When the pressure inside the container increases, water gets pushed out of the container through the non air carrying tube into the open, via the nozzle. Therefore it is very important for the water container to be absolutely air tight to be able to maintain a constant pressure through expulsion of water.
        The design of the project too is nothing too complex, although it was made to make space use as efficient as possible. In the back, a small rectangular platform houses the water container, secured by two elastic restrainers. Right after that are the two motors in an upright position, directly driving the compressor. The NXT brick is situated right in front of these motors. Finally in the front is the push handle with touch sensor, along with a nozzle. Whenever the push handle is pressed, the touch sensor is also pressed, which causes the NXT to drive the motors, leading to flow of water through the nozzle. The handle returns back in place due to rubber bands. I designed the whole front setup to mimic and actual water dispenser.
        There is not a lot of programming involved in this project. The NXT runs the motors whenever the touch sensor is pressed. However, a lot of other sensors could be used. For example, the motors could start running whenever a cup is placed in the platform, with input provided to the NXT by an ultrasonic sensor. Or using a sound sensor, water could be dispensed by clapping of the hands and stopped again by doing the same. Like the Mindstorms motto, the possibilities are indeed endless!
        I have included links for the code for the NXT down below. There are three different files, one for using a touch sensor as input, the others for using a sound sensor and ultrasonic sensors as inputs. The code in all files is annotated. To compile and run these files, use the nxjc and nxj commands. If you are unsure on how to do this, here is a link that can help you out. As for the model itself, I might upload an LDD file of the model in the near future. In the mean time, you can look at the video below of the Mindstorms water dispenser in action and try to build your own version.


Link to the NXT program with the Touch Sensor
Link to the NXT program with the Sound Sensor
Link to the NXT program with the Ultrasonic Sensor

This is not the end.....

Wednesday, March 2, 2011

The NXT step

Greetings

For a long time, I wanted to use my programming abilities in robotics. I wanted to create a robot and program it myself to respond to stimuli, unlike the pre-programmed ones that were available in the market. This meant that I had to buy motors, PC boards, micro-controllers, switches and sensors independently, assemble them and then program them.  While I searched the net to buy these parts (A lot of companies did not ship to the Middle East, where I used to live), I started getting disheartened because of the nonavailability of the most basic micro-controllers and motors.
                Fortunately for me, Lego and MIT released the Lego Mindstorms Kit. While the NXT-G programming language was sufficient, Visual Programming lacked a certain something that had drawn me to textual programming languages. When the good guys at LeJOS released LeJOS v0.85, I immediately flashed my NXT to that version(The latest version at the time of writing is 0.90, refer to this page to see how to flash your NXT and get the LeJOS environment running on your computer) and began coding in sweet, sweet Java. I had always been fascinated by remote controlled cars, so the first thing I set out to do was to create a program to control my NXT vehicle via input from the keyboard. To do this, I created a small GUI based Java program(send.java) which acted as the control center. The program had a command log, connect, disconnect, shutdown and options(The options button has no functionality currently) buttons, and a text area to receive the input form the keyboard. The program sent commands from the keyboard to the NXT(running rec.java) via Bluetooth. The NXT acts as a slave(The main thread is pretty much stopped from executing, until a Bluetooth connection opens) and waits for input from the computer and acts accordingly. My program works in a simple manner. When I press the top arrow key, the key-code of that key specified by Java is sent to the NXT and the NXT knows to move forward, and so on. The idea is simple in concept, but it does have a few problems. One of the problems is that in this model, the sending of two commands simultaneously is a bit of a hassle. Right now, the robot can turn or move, but not at the same time. One possible solution would be to multiply the key-codes of the two arrows and  return the product as input for the NXT because for the key-codes 37, 38, 39, 40, the product of any two numbers is different from the product of any two other numbers in the set(note that the same cannot be said for addition.) In any case, the program does the work of successfully sending commands to the NXT, albeit not with a lot of options. This is just a test program, and I am working on another one with greater functionality(one that has a working options button!)
                 In any case I will put the files that run on the NXT and on the computer up for download. Please note that to run these files, you should have LeJOS installed on both the NXT and the Computer. The files to be run on the NXT will be called rec.java and the file to run on the computer will be called send.java.Here is what you have to do. Open up command prompt and and navigate to the folder where you have placed the two files. Then type in the following commands:

nxjc rec.java              (compile the rec.java file)
nxj rec                    (upload the rec.class file to the NXT)
Now go the NXT and execute the rec.nxj file. Go back to command prompt.
nxjpcc send.java           (compile send.java)
nxjpc send                 (run send.class, AFTER starting rec.nxj on the NXT)

I have once again annotated the code, explaining how and why it works. Please edit the code, add your own functionality and experiment with it. I am once again releasing the code under the MIT license.  You can use any NXT car creation you want to test out the program, but the model has to turn via a difference in the speeds of the different sets of wheels, like in a tank. I used the 30 minute model from Lego Mindstorms for testing purposes, here is a link to the instructions to build a similar model. You can replace the tracks with wheels if you want. Also, here is a video of the program and the NXT in action.

Here are the links for the two.java files. I have not created any JARs as they are really not needed.

rec.java (On the NXT)
send.java (On the computer)

This is not the end.......

Friday, February 25, 2011

What more can you ASCII for?

Greetings

I am not the artistic type, but that does not mean that I do not appreciate art. While I do like art created by others, I sometimes wish that I too was gifted with artistic abilities. Once again, using the awesome powers of Java, I was able to realize this dream. Using simple Java code, I created an image to ASCII converter program which takes an image and outputs a text file with ASCII characters, which looks like the input image when viewed all at once. In this post I will explain the basic principle behind computer generated ASCII art, and how to implement it using Java. I will release my own code for the program that I built, the program itself and a short video of the program in action. From now on, I will release all my code under the Open Source Initiative (OSI) MIT License (MIT), because the license is clean, short and easy to understand. Before I explain the principle behind ASCII art, here are some of the ASCII art created by the program: 
That's me!!

The Simpsons are ASCIIfied!
p-51 Mustang- A classic

The principle behind ASCII art is easy to understand. An image can be thought of as an 2 dimension array with rows and columns that correspond to the width and height of the image (In reality, it is more complex than that but this is a good enough understanding for the time being). Each cell in this array holds a pixel. When all these pixels are viewed together at once, you get an image. So a 400x400 image has 400 rows and 400 columns, and has 160000 pixels. Now to convert an image to text, the program has to iterate through all the pixels, get its RGB value, convert it to its gray scale value, and append a suitable ASCII character. Java has a class called the BufferedImage class, which has the methods necessary to obtain the RGB values of a pixel. Now once the RGB values(ranging from 0 to 255) of the pixel is obtained, there is a simple formula to convert it to a gray scale value. Simply take ~30% of the Red Value,  ~59% of the Green value and ~11% of the blue value and add them up together to a value ranging from 0 to 255, 0 being the darkest and 255 being the brightest. Don't worry, the BufferedImage class has the necessary methods to obtain these values,which you can see in my annotated code posted below.This value is your gray scale value. Generally gray scale value range from 0 to 1 with decimals in between, but there is no reason for them to be between 0 and 255. You could divide it by 255 to range it from 0 to 1, but why the extra hassle? After obtaining the gray scale values, the creative part begins. As you know, some ASCII characters appear darker than the others. For example, # appears darker than 0.So what the program does is obtain the gray scale value of each pixel, and according to the value, append an ASCII character to the text file. For example, if the gray scale value is in between 180 and 200(very bright), it appends a ".", and if it is 50 and 70(very dark), it appends  a "#". Currently there are nine different ASCII characters that the program chooses from to append. However, I urge you to edit the code and experiment by adding more characters, changing the existing characters, etc. For a detailed explanation, read the comments in my code which explain the function and workings of each method. The results are stored in a file called result.txt, and when viewing the results in a text editor, choose a small bold mono-spaced font, with word wrapping DISABLED. I recommend choosing images not bigger than 600x600 as the task will become more and more resource intensive with bigger images. While the current program does have an area where the results are appended, for spectacular results, open up the result.txt file and choose the best font and size to view the art. I find that Prestige Std Elite and OCR A work really well, almost giving the illusion of colors. This program is only a test, and soon I will be releasing code to a program with better GUI, more options and ultimately more robust. But until then, here is a small video below which runs you through the code of the program and explains how the program works. 


And finally here are the links to the code of the program and the actual program and the Netbeans Project. Please go through the code, experiment with it and hope you learn something out of this.


This is not the end

Aravind Rao
                  

Sunday, February 20, 2011

Prim's Algorithm

Greetings

Sometime back, I wanted to dive into a programming topic called graph theory. Graph theory is an extremely interesting topic in the sense one needs to use their brains to solve graph problems. Also many problems, such as the traveling salesman problem have only been partially solved at yet, making it a NP hard problem. I decided to start my dive with a lesson in Prim's Algorithm. However after countless hours of scourging the web, I could not find the code, nor an explanation simple enough for me to understand the algorithm. Thanks an awesome video I found on YouTube(I don't have the link, but I find it, I will post it here) on the Prim's Algorithm I was able to write my own interpretation of the Algorithm. This code makes use of arrays and simple vectors and is extremely easy to understand. I though of posting this code because I wanted anybody else in my position to be able to understand Prim's algorithm without having to resort to complex, unnecessary code. So what is the Prim' algorithm? Ever heard of problems such as the length of road required to connect all cities? or the cabling needed to form a network of computers, but some computers acting as proxies for the others? Well for all these problems, the MST or the minimum spanning tree has to be found. Imagine a group of cities (A to E) to be the nodes in a graph. Now imagine the distance between them to be the edges in a graph. Here is a pic.
An Example Graph
So the DIRECT distance from A to B is 10, A to E is 34, etc. However what is the least length of road to be constructed so that all the cities are connected? It is certainly not 106, the sum of all the distances. It happens to be 22 or the MST of the graph of cities. Try it out. cross out the distances of 33, 34 and 17 and you should still be able to travel from any city to any other city! Solving such problems require MST which can be found using the Prim's algorithm.The code I release for Prim's algorithm will have a detailed explanation on how it works. Here is a gist: start from any node, mark it visited. Choose the shortest path from all paths available and the add the path length to your MST counter. Get the node at the other end of the chosen path and mark that visited as well. Now considering the paths from all visited nodes, choose the shortest path and mark the node on the other end as visited. Continue to do this until all nodes are visited and once done you have the MST! The Prim's algorithm is great for finding the MST, although a little bit slower than other algorithms. However it is a simple algorithm to learn and is fun to work with. Links for the code and explanation down below. Once again you are free to modify and distribute the code with proper credit given.

Link to .exe file.
Link to code.

This is not the end...

Aravind Rao

Tuesday, February 15, 2011

Java to the rescue!

Greetings

Some time back, I decided to run for the position of secretary in the student council of my school. Being a secretary appealed to me; I did not want a position that was constantly in the limelight and I enjoyed tasks such as data handling and processing (student data and volunteer info). I was subsequently elected and while reviewing the duties of  a secretary, I realized that there was no real system in place to store, view and edit member data. I found out that previous secretaries had left this responsibility to the members themselves; that is the reporting of the hours volunteered and so on. It did not seem right to me to allow volunteers to self report theirs hours. However it was seemingly the only option considering there was no concrete system in place. One of my fellow student council members had the "bright" idea to use an excel document; At 300+ members and over 100 activities per year, the excel cells to be edited would exceed 30000. There had to be another method. Finally, it was Java that came to my rescue! I decided to create a Java GUI Swing App combined with a self written text file parser. Every time a new member is added, the app creates a new text file with name, grade, etc as well as a volunteer hours summary, edited to look like a table. Adding hours to members files involves using the text file parser. which searches for special indexes and edits the file accordingly. Since the data is stored as text files, it can be printed out and handed back to members to increase transparency. I set out to code the app and in about a week finished it. It was a mad rush of coding ~ 440 lines of Java. All the codes are in a single file, though looking back in retrospect, I should have used interfaces and abstract classes for more readable code. However, it was the best I could do in a week! In any case, it helped me tremendously in processing members and their hours. I also built upon this code to build a simple payroll program for a local dentist's office. Although I cannot release that code until they allow me, here is a screen shot below:
My more complex payroll app screenshot.

As you can see, it is a pretty complex app with over 1250 lines of code. I shall be however posting links for the source code and entire project of my Student Council Secretary App as well as the .jar file. I have annotated key parts of code, but if you have any questions, please post a comment question on this post. When using the app, he member files are created in the same directory as that of the app. Like always, you can use, modify and redistribute it without any license. If you do redistribute it, It would be nice if you could add my name somewhere in the file, but if you cannot, it is not really a problem. Here are the links:
Link to download zipped Netbeans project (source code in the Hours-src-hours folder.)
Link to download .jar executable file. (Not tested on Mac, but should work. Works in Ubuntu and Windows)

This is not the end...

Aravind Rao

Wednesday, February 9, 2011

Intelligent Code

Greetings

Every problem in Computer Science can be solved by accounting for every possible permutation that the program might encounter. Naturally this is not an efficient practice, especially when  the number of possibilities can grow exponentially, reaching billions in no time. To effectively solve such problems, we need to implement  a kind of logic, based on our own thinking while problem solving. This inherent 'common sense' of humans can help create powerful algorithms to solve computer problems, without the aid of brute force. An example of such a problem is a computer game (Source .cpp, and .exe), where a computer tries to guess a users' choice within a given range. If the users' choice is >= the computers' guess, the user inputs 0. If the user's choice is < than the computer;s guess, the user inputs 1. Naturally, the computer can iterate through all numbers in the range from lowest to highest and check whether the computers' guess matches the users' choice and arrive upon the answer when the user inputs one(the users' choice will be the current computers' guess - 1). However what if the range extended from 1 to 2^10? Does it make sense to loop through all those numbers, check for user input and output the answer? This method is not time or user friendly. However, if we implement an algorithm that imitates the way we think when solving such a problem, we can arrive upon an extremely efficient solution for this problem. Consider the range 0 to 16. The user's choice is 11. Now lets add 1 to 0 and 1 to 16, to make the range 1-17. This is done because we will than have 2 nice halves of the range: 1-8 and 9-17. This idea of dividing the range into half will be central to out algorithm. You will get why I do this later. Now the computer has 1\16 or 6.25 % chance of guessing the right user's choice. If it iterated through all the values of the range and checked it against the user input, the probability of the program guessing the right choice will be increased to 6.67% -> 7.14 %...etc.(Not really, but for the time being, let us consider the case to be true). What should the program do to arrive upon the answer faster and in fewer tries? It should try to increase the probability of getting the right answer in each successful turn by a greater rate. For example in the range 1-17, the computer programs' first guess has to be (1+17)/2 = 9 or the average of the range extremes. Why? Because if the user inputs 1, the users' guess is less than 9, so it is in the range 1-8. Alternatively, if the user inputs 0, the users' guess will be greater than or equal to 9, and thus in the range 9-16. What have we achieved here? We have increased them probability of the computer guessing the right answer in the next turn to a whooping (1/8)% = 12.5%, which is the double the probability of guessing the right answer of the programs' first turn. Compare this with the 6.67% probability while iterating through all values!Now since the user's choice is 11, he will input 0, and now the computer program will carry out the same operation, although this time on a different range, that is 9-16. After this turn, the probability of guessing the answer right will increase to 25%, then to 50% and finally to 100% When it reaches 1000%, the program will have the answer! his method only works on ranges whose higher extreme can be expressed as:
Log2(Higher Extreme) = some Natural Number.
Therefore 16 works(log2(16) = 4), so does 8. 32 and 4096. The number of guesses the program will make is log2(higher Extreme). In the case of the higher Extreme being 16, the program will make 4 guesses, in the case of 32, it will make 5 guesses and so on.
I have provided the links to the source code and .exe file of this 'game'. Feel free to edit it, distribute it and use it, although with proper credit!

Link to .cpp source file.
Link to .exe playable game file.


This is not the end

Aravind Rao

Monday, January 3, 2011

Onto the NXT project

Greetings

Until the NXT time it is! If you picked up from the last post, you would have guessed that the NeXT post is going to something about Mindstorms NXT. And it is. In this post I am briefly going to talk about a technology which has united my two greatest passions: Programming and Robotics! Mindstorms, by Lego, is a Robotics Kit which one use to build and program fully or partially autonomous programmable robots (Robots including, but  not limited to bipedal humanoids). Lego Mindstorms was released following a collaboration between Lego and MIT's Media Lab. The Lego Mindstorms started out as Mindstorms v1.0 and the latest version now is the Mindstorms NXT v2.0, a huge leap from its predecessors in terms of processing power by the Mindstorms Brick and availability of different kinds of sensors. Lego Mindstorms NXT is programmable through the NXT-G programming software(simple programs can be built on the Brick itself), which supports Visual Programming. I, however owning to my hacker nature, decided to go one step forward and installed the LeJOS firmware on my NXT. LeJOS allows the NXT to execute special byte-code from LeJOS specific java programs! This means that you can code all you NXT programs in leJOS Java(similar to Java ME), convert it to special byte-code with the help of LeJOS NXJ on your computer(similar to the java  JDK) and transfer the byte-code to the NXT and execute it using the LeJOS Virtual Machine. As one can see, the ability to use such a powerful language greatly increases the possibilities of the Mindstorms NXT. Also LeJOS can be used to communicate(2 way data streams) with other Java programs, whether they reside in a computer, a smart phone or even another NXT! Using you cellphone to control your NXT or developing a Client-Server relationship between the NXT and the computer can be achieved through LeJOS. The methods of communication are BlueTooth and the USB specifications. LeJOS is the not the only custom firmware for the NXT; ROBOTC and BrickOS can be used to run c/c++ programs on the NXT. For now however,  I will be sticking to LeJOS. I will soon be posting a page on how exactly to get LeJOS on your NXT, as well as many clever, innovate programs for LeJOS NXT.  Until then, take a look at a list of useful sites that I have posted down below!

Never The End.

******************
**Some Useful Sites**
******************

The LeJOS API
The LeJOS PC API
Great NXT tutorials
A NXT LeJOS forum